You spent real money on a roof restoration, and now you’re wondering if the job was actually done right. That’s a fair concern. Without a clear checklist, most North Georgia homeowners have no idea what a successful restoration looks like from the outside, let alone what to verify inside the attic. North Georgia’s humid summers, heavy storms, and seasonal temperature swings make roofing quality especially critical. This article walks you through exactly what to look for, room by room and layer by layer, so you can feel confident your investment is protected.
Table of Contents
- Understand what real roof restoration means
- Essential exterior signs: What to check on your roof
- Interior clues: Attic and ventilation checks
- Warranty coverage and documentation: Proof your restoration will last
- Comparison table: Summary of success signs
- Our take: What most homeowners miss about roof restorations
- Ready for assurance? Professional inspections and roof care in North Georgia
- Frequently asked questions
Key Takeaways
| Point | Details |
|---|---|
| Exterior tells the story | Uniform surfaces, sealed flashings, and clean gutters reveal quality roof work. |
| Don’t skip attic checks | New moisture, mold, or light mean leaks may not be fixed—always inspect inside. |
| Warranties protect your investment | Get clear written coverage; it matters more than you realize if issues arise. |
| Local climate demands careful venting | North Georgia’s humidity means attic airflow and watertight seams are vital. |
| Documentation is peace of mind | A job isn’t finished until paperwork matches the quality you see on your roof. |
Understand what real roof restoration means
Before you can spot a great restoration, you need to know what one actually involves. A lot of homeowners assume restoration means a fresh coat of sealant or a quick patch job. Real restoration goes much deeper than that.
Genuine roof restoration includes a full assessment and correction of the underlying structure, called the substrate (the decking and framing beneath your shingles or coating). If a contractor skips this step and goes straight to coating or reshingling, any problems underneath will resurface fast. Restoration methodology is not just exterior coating or paint. The credible approach involves correct preparation plus repairing substrate deficiencies before coating, so the system can adhere and stay watertight.
If you want to understand roof restoration basics before diving into inspection details, that background will help you ask the right questions.
Here’s what a proper restoration should include:
- Full surface inspection before any materials are applied
- Removal of damaged or deteriorated materials, not just coverage over them
- Repair of decking, framing, or substrate issues found during inspection
- Correct preparation of surfaces to ensure adhesion and waterproofing
- Application of roofing materials or coatings to a clean, repaired base
- Sealing and detailing at every penetration, edge, and joint
“The more credible restoration approach involves correct preparation plus repairing substrate deficiencies before coating, so the coating system can adhere and remain watertight.” — Commercial Roof Guide
Anything less is a surface fix, not a true restoration. Knowing this distinction protects you when reviewing a contractor’s work.
Essential exterior signs: What to check on your roof
Understanding the right process helps, but what should you check once the work is done? Start with what you can see on your roof.
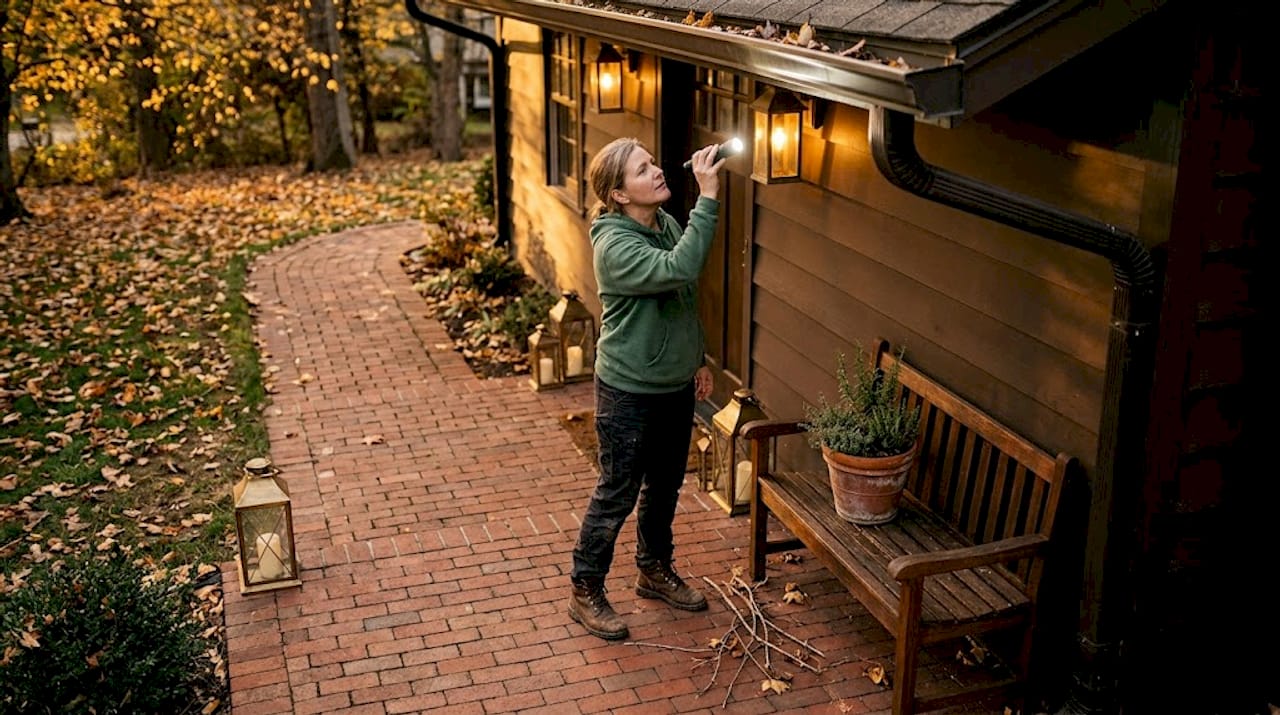
You do not need to climb onto your roof to do this. A pair of binoculars from the ground or a walk around the perimeter will reveal most surface-level red flags. Knowing what to look for makes all the difference.
Surface uniformity and color consistency
A properly restored roof should look even. Shingles should lie flat with no visible buckling, lifting, or curling at the edges. Coatings should be uniform in color and thickness with no thin spots, bubbles, or patches of discoloration. Uneven application often means the surface was not prepped correctly or the coating was applied in poor weather conditions.
Flashings and penetrations
This is where many restorations fall short. Flashings and penetrations are the most common failure points, and they must be detailed correctly. Flashings are the metal pieces that seal junctions between your roof and chimneys, vents, skylights, and walls. After restoration, they should be tight, rust-free, and sealed with fresh caulk or flashing cement. If you see any gaps, rust stains, or lifted edges around these areas, that’s a sign the work was incomplete.
📊 Stat to know: Studies show that a significant portion of roof leaks trace directly back to failed flashing or improperly sealed penetrations rather than the field (main surface) of the roof itself.
Gutters and drip edges
Walk around your home and check your gutters. After a quality restoration, gutters should be clear of roofing debris and granule buildup. If your gutters are packed with shingle granules after the job, it may mean the new shingles are already shedding, which is a quality concern. Drip edges (the metal strips along the roof’s perimeter) should be securely fastened and properly overlapping the gutter.
Pro Tip: Run a hose along the roofline during dry weather and watch how water drains from the roof into the gutter. If water pools, backs up, or drips behind the gutter, the drip edge may have been installed incorrectly.
Understanding the difference between a minor issue and a full problem is important. Reviewing a repair vs replacement breakdown can help you figure out if what you’re seeing requires a callback or a more involved conversation with your contractor. For homes that went through storm damage, the storm damage repair steps process adds another layer of inspection criteria to verify.
Interior clues: Attic and ventilation checks
Once you’ve checked the roof’s exterior, the next step is investigating what’s happening inside your attic and ventilation system.
Many homeowners skip this step entirely. That’s a mistake. Interior issues are often the first sign that the restoration didn’t fully address moisture entry or ventilation problems. Here’s how to do a thorough attic check:
- Look for daylight through decking. Go into your attic during daylight hours and turn off any lights. If you can see any spots of light coming through the decking or ridge, those are gaps that will let in water and pests.
- Check for moisture stains or mildew. Look at the rafters, sheathing (the boards covering the rafters), and insulation for dark stains, discoloration, or a musty smell. Any of these after a restoration signals incomplete waterproofing.
- Assess soffit and ridge vents. Your soffit vents (at the roof’s lower edge) and ridge vent (at the peak) create airflow that moves heat and moisture out of your attic. Ensure none were blocked or damaged during the restoration.
- Check insulation for wet spots. Wet or compressed insulation is a clear sign of water intrusion, even when the roof surface looks fine from the outside.
- Monitor after the next rain. Check the attic within 24 to 48 hours after a significant rainfall. This is the most reliable way to confirm the restoration held up under real conditions.
“Inspection checklists commonly include flashing and drip edge integrity, vent and penetration sealing, gutter condition, and attic signs like moisture or mildew, all of which point to ventilation or water intrusion issues.” — GAF Residential Roof Repairs Checklist
North Georgia homeowners have a specific challenge here. The region’s high humidity from spring through fall means attics can develop moisture problems even without an active leak. A post-restoration inspection should include both exterior observations and interior verification, because leak pathways often begin at junctions and only show up inside the home much later.
Pro Tip: Take photos of your attic before the restoration starts so you have a clear before-and-after reference. This is especially valuable if you ever need to file an insurance claim or call back a contractor for warranty work.
Addressing moisture early protects your investment significantly. Knowing why timely repairs matter gives you more context on how quickly small issues can escalate in our climate.
Warranty coverage and documentation: Proof your restoration will last
Even with an excellent visible job, paperwork may be your only recourse for hidden flaws, so documentation matters.
After a restoration, you should have at least two types of warranty in hand. Understanding the difference between them is critical.
| Warranty type | What it covers | Typical duration | Who provides it |
|---|---|---|---|
| Manufacturer warranty | Defects in the roofing material itself | 20 to 50 years (varies by product) | The material manufacturer |
| Contractor workmanship warranty | Errors in how materials were installed | 1 to 10 years (varies by contractor) | Your roofing contractor |
Workmanship coverage terms are critical because manufacturer warranties often exclude damage caused by improper installation. If your contractor’s workmanship warranty is vague or nonexistent, you may have no recourse when installation errors cause leaks or premature failure.
Here’s what complete post-restoration documentation should include:
- Signed contract with a scope of work listing every task completed
- Material receipts confirming the specific product brands and quantities used
- Contractor workmanship warranty in writing with clear terms and duration
- Manufacturer warranty registration confirmation (often submitted online by the contractor)
- Permits and inspection records if your local county required them
- Before and after photos from the contractor showing the work completed
Pro Tip: If your contractor cannot provide a written workmanship warranty, that is a major red flag. A licensed contractor should have no hesitation putting their work in writing. This is also one of the most important factors in choosing the right contractor from the start.
Comparison table: Summary of success signs
To bring it all together, here’s a visual summary showing what to look for in each area.
| Inspection area | Signs of success | Red flags to watch for |
|---|---|---|
| Roof surface | Uniform color, flat shingles, consistent coating | Bubbles, buckling, uneven patches, bare spots |
| Flashings | Tight, sealed, no rust or gaps | Lifted edges, rust stains, missing caulk |
| Gutters and drip edges | Clear gutters, secure drip edge, proper water flow | Granule buildup, backed-up water, loose or missing drip edges |
| Penetrations | Sealed vents, chimneys, and skylights | Visible gaps, missing flashing, cracked caulk |
| Attic interior | No daylight, no moisture stains, good airflow | Wet insulation, mildew smell, visible light through decking |
| Ventilation | Open soffit and ridge vents, no blockage | Blocked vents, heat buildup, condensation on rafters |
| Documentation | Written warranty, permit records, material receipts | Verbal-only agreements, no proof of materials, missing warranty |
Use this table as your personal inspection checklist after any restoration project. If most boxes check out but one area shows red flags, that’s where to focus your follow-up conversation with your contractor.
Our take: What most homeowners miss about roof restorations
Here’s something most roofing guides won’t tell you directly: the exterior of your roof can look perfect and still fail within a year or two. We’ve seen it happen. Beautiful surface, clean gutters, sealed flashings on the outside. But the attic was showing moisture buildup within the first wet season.
Why? Because a contractor focused only on what’s visible. The exterior gets done properly, the crew packs up, and everyone feels good about the outcome. But the ridge venting wasn’t reopened after the ridge cap was replaced. Or the old ice and water shield (a self-adhesive waterproof layer beneath shingles) was patched rather than replaced in a key valley area. These are details that don’t show up on the surface.
In North Georgia specifically, ridge venting and flashing details are not optional extras. Our seasonal storms, combined with summer humidity levels that regularly hit 80 to 90 percent, create an environment where any ventilation gap or flashing miss will show up fast. The attic becomes the proving ground for a restoration’s real quality.
We also see too many homeowners accept verbal agreements on warranty coverage. In writing or it didn’t happen. A contractor who does quality work won’t hesitate to put it in a document. If a contractor resists providing written workmanship coverage, that tells you everything about how confident they are in their own results.
Our honest advice: spend 20 minutes in your attic after the next rain. Review the roof restoration details if you have any doubts about the scope of work you were sold. And get your warranty terms in writing before the crew leaves your property.
Ready for assurance? Professional inspections and roof care in North Georgia
You’ve put real money into your roof. You deserve to know it was done right.

At Infinity Roofing GA, we provide post-restoration inspections and full roofing services across North Georgia, including Dallas, Marietta, Kennesaw, and the surrounding counties. Whether you had work done by another contractor and want a second opinion, or you’re ready to schedule your restoration with a team you can trust, we’re here to help. Our storm damage repair service covers the full scope of roof assessment and repair after severe weather, and our gutter services keep the full drainage system working after restoration is complete. Same-day responses, licensed and insured crews, and honest pricing are what we bring to every job.
Frequently asked questions
How soon after restoration should I inspect my roof?
You should do your first inspection immediately after work is completed, then again after the next significant rainfall to confirm no leaks or surface issues have appeared. Key checkpoints include flashing integrity, vent sealing, gutter condition, and attic moisture.
What are the most common signs of a bad restoration?
Uneven surface color, loose or missing flashings, poorly sealed vents, and new attic moisture or daylight through the decking all signal improper work. These are the most critical failure points that every restoration must address correctly.
Is a roof restoration warranty really necessary?
Yes, a written warranty ensures both contractor errors and material defects are covered. Workmanship coverage terms and manufacturer warranties serve different purposes, and you need both for complete protection.
Does roof restoration improve home value in North Georgia?
A successful restoration improves curb appeal, prevents future structural damage, and signals to buyers that the home has been well maintained, all factors that support stronger resale value in our local market.
How can I check if my contractor followed all the correct steps?
Review your signed contract against the completed work, examine the attic for moisture or daylight, and request copies of all material receipts and warranty documents. If anything looks incomplete, the restoration preparation standard requires correct substrate repair before coating, so verify those steps were actually performed, not just listed on paper.