North Georgia winters are mild compared to the Midwest, but don’t let that fool you. Freeze-thaw cycles, unexpected ice storms, and even modest snowfall can quietly tear apart a roof that hasn’t been prepared. The winter roof care tips in this guide are written specifically for this region, where temperatures swing dramatically within a single week and homeowners often underestimate what that stress does to shingles, gutters, and attic systems. Get ahead of the damage before it costs you thousands.
Table of Contents
- Key takeaways
- 1. Understand the key winter risks to your North Georgia roof
- 2. Complete your pre-winter roof inspection checklist
- 3. Safe snow removal from roof tips
- 4. Optimize your attic to prevent ice dams
- 5. Stay on top of gutters throughout the winter season
- 6. Complete your post-winter roof inspection
- My honest take on winter roof care in North Georgia
- Ready to protect your roof this winter? Ir-ga is here to help.
- FAQ
Key takeaways
| Point | Details |
|---|---|
| Gutters must be clear | Clogged gutters cause water to back up and damage fascia, roof decking, and more. |
| Attic is the real fix | Air sealing and insulating your attic floor prevents ice dams more reliably than any surface treatment. |
| Inspect before and after | A pre-winter and post-winter roof check catches problems early, before small issues become major repairs. |
| Snow removal needs care | Use a roof rake from the ground to clear snow without damaging shingles or risking a fall. |
| Know when to call a pro | Flashing issues, lifted shingles, and attic moisture signs all warrant a licensed inspection. |
1. Understand the key winter risks to your North Georgia roof
Before you can apply solid winter roof maintenance advice, you need to know exactly what you’re up against. North Georgia’s climate is not the same as Minnesota, but it creates its own specific set of hazards.
Ice dams form when heat escaping from your living space warms the upper roof surface, melting snow that then refreezes at the colder eaves. That ice wall traps meltwater behind it, and that water has nowhere to go except under your shingles. Water intrusion from ice dams leads to mold, wood rot, and structural damage that often goes undetected for months.
Here are the warning signs to watch for during and after cold spells:
- Large icicles forming along the eaves
- A visible ridge of ice at the roofline
- Water stains on interior ceilings or walls near exterior edges
- Moisture or frost in the attic after cold nights
- Sagging gutters from ice weight
One point that surprises most homeowners: icicles alone don’t tell you how serious the problem is. The real danger is the trapped meltwater behind the ice dam, slowly pushing into your roof system. By the time you see a ceiling stain, the damage is already done.
Freeze-thaw cycles also put repeated stress on shingles and flashing. When water gets into a small crack and freezes, it expands and widens that crack. After several cycles, what started as a minor gap becomes a real leak path. This is especially relevant in North Georgia, where temperatures can drop below freezing at night and climb back into the 50s by afternoon.
2. Complete your pre-winter roof inspection checklist
A good seasonal roof care guide always starts with inspection before problems arrive. Set aside time in late October or early November to work through this checklist before freezing temps hit.
- Clean gutters and downspouts. Clogged gutters cause water to overflow and saturate your fascia boards and roof decking, leading to expensive rot. Remove all leaves, pine needles, and debris. Flush downspouts with a garden hose to confirm water flows freely.
- Inspect shingles closely. Look for curling edges, cracked or missing shingles, and granule loss in gutters. Granule loss accelerates after the first few freeze-thaw cycles if shingles are already worn.
- Check all flashing points. Flashing around chimneys, skylights, vents, and roof valleys is where leaks most often start. Look for lifting, cracking, or gaps in the sealant. Even a small gap becomes a serious problem once water freezes inside it.
- Examine attic ventilation and insulation. Go into your attic on a cold morning. If it feels noticeably warm or you see frost on the underside of the roof deck, heat is escaping from your living space. That is the condition that creates ice dams.
- Look for pest entry points. Squirrels and rodents move into warm attic spaces in fall. Check for chewed wood, droppings, or entry holes around the roofline and soffit areas.
- Check for an ice-and-water shield membrane. If your home is older or you’ve had past ice dam problems, an ice-and-water shield installed under shingles in vulnerable areas provides a secondary barrier against water infiltration. Ask a contractor whether yours is in place.
Pro Tip: If your roof is older than 15 years, schedule a professional inspection before winter rather than relying on a DIY visual check alone. A licensed roofer can identify issues on the roof surface and underneath that are not visible from the ground or a ladder.
3. Safe snow removal from roof tips
After a winter storm, the instinct is to get up on the roof and start clearing. That’s exactly the wrong move. Here are the best practices for keeping your roof clear without causing new damage or injury.
- Use a roof rake, not a shovel. A roof rake lets you pull snow off from the ground or a safe standing position. Remove snow safely starting from the edge and working upward in small sections. Never use a metal shovel on shingles.
- Focus on the lower 3 to 4 feet. Clearing the lower roof area reduces the snow available to melt and refreeze at the eaves, which lowers your ice dam risk. You do not need to remove every inch of snow from the entire surface.
- Never walk on an icy roof. This is a serious injury risk. It also causes shingle damage that may not show up until spring.
- Avoid rock salt or table salt on your roof. Salt accelerates shingle deterioration and corrodes metal flashing. Calcium chloride in a sock or tube placed across the ice dam is a safer short-term option to create a melt channel.
- Skip heat cables as a permanent fix. Electric heat cables create melt channels but do nothing about the underlying heat loss that causes ice dams. They also raise your energy bill. Treat them as a temporary measure, not a solution.
Pro Tip: After heavy snow, wait 24 hours before raking if temperatures are expected to climb above freezing. The snow may clear naturally without any roof contact, which is always the safest outcome.
4. Optimize your attic to prevent ice dams
This is the section most homeowners skip, and it’s the most important one. How to protect your roof in winter starts from the inside, not the outside. The attic is where the real fix lives.
Reducing ice dam risk requires three things working together: air sealing, insulation, and balanced ventilation. Miss any one of them and the others don’t perform as expected.
Here is what that looks like in practice:
- Air seal attic floor penetrations first. Every light fixture, plumbing stack, and wall top plate that passes through your attic floor is a potential heat leak. A typical attic has dozens of these small gaps. The attic hatch itself is often the biggest single leak point and one of the easiest to fix with weatherstripping and rigid foam.
- Insulate to the right R-value. For North Georgia’s climate zone, the Department of Energy recommends attic insulation between R-38 and R-60. Uneven or compressed insulation creates warm spots on the roof deck that trigger localized melting and refreezing.
- Balance your soffit and ridge vents. Balanced attic ventilation draws cold air in through soffit vents at the bottom and exhausts warm, moist air through ridge vents at the top. This keeps the roof deck cold and dry, which is what you want.
| Attic issue | Likely result | Fix |
|---|---|---|
| Inadequate insulation | Warm roof deck, ice dams | Add insulation to meet R-38 to R-60 |
| Blocked soffit vents | Poor airflow, moisture buildup | Clear debris, install baffles |
| Unsealed attic hatch | Largest single heat leak | Add weatherstrip and rigid foam cover |
| Compressed insulation | Hot spots, uneven melting | Replace or redistribute insulation |
Pro Tip: Air sealing must come before you add more insulation. Piling more insulation on top of unsealed gaps just traps the heat that’s already leaking through. Seal first, then insulate.
Consider pairing your attic work with balanced home heating strategies to reduce overall heat transfer to the roof deck. Keeping your home’s heat distribution even across floors helps control attic temperatures naturally. This is a key element in the best winter roofing practices for homes with multiple stories.
5. Stay on top of gutters throughout the winter season
Gutters don’t just matter in fall. They’re a live maintenance item all winter long. Ice buildup in gutters is one of the fastest ways to compound existing roof problems.
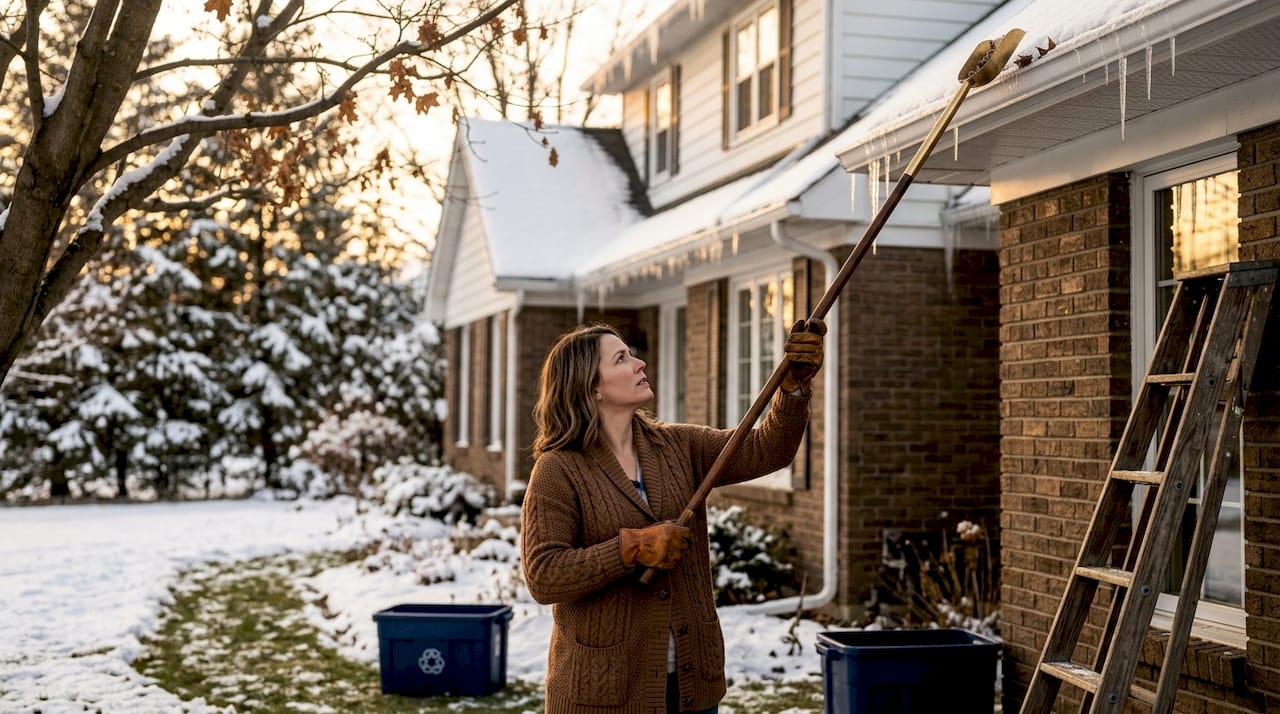
Keep gutters clear of debris after every significant storm. If ice forms inside your gutters, the weight can pull them away from the fascia. Gutter blockages lead to costly damage when water backs up and soaks fascia and roof edges, sometimes without any visible sign until rot sets in.
For property managers overseeing multiple buildings, consider scheduling monthly gutter checks between November and March. The cost of labor for a monthly check is a fraction of the cost to repair a rotted fascia board or damaged roof deck.
6. Complete your post-winter roof inspection
Spring doesn’t mean the work is done. This is the most important seasonal roof care guide task that homeowners consistently skip.
- Inspect gutters for damage. After winter, look for sagging sections, separated joints, and rust. Clean out the final debris from late winter before spring rains arrive.
- Check for popped nails and lifted shingles. Freeze-thaw cycles can push nails up about 1/16 inch, which opens a leak path that only becomes visible inside your home after rain. Walk the perimeter and use binoculars to scan the roof surface.
- Inspect your attic for moisture and mold. Freeze-thaw cycles cause small displacements in roofing components that are invisible from outside but show up as moisture damage inside. Check the attic for dark staining, soft wood, or a musty smell.
- Look at all sealant points. Chimney flashing, vent collars, and skylight seals often crack or pull away over winter. Press along the edges with your finger. Any softness or gaps need resealing before the spring rain season.
- Schedule timely repairs. Waiting until summer to address post-winter damage extends the problem through months of spring rain. Timely roof repairs consistently cost less than the water damage that accumulates from delayed action.
For any damage you find, check whether a professional review is warranted before attempting repairs. Knowing how to choose a roofing contractor in North Georgia will help you avoid hiring someone who isn’t qualified to assess winter-related structural issues.
My honest take on winter roof care in North Georgia
I’ve seen a lot of North Georgia roofs after winter, and the pattern is consistent. Homeowners who wait until they see a water stain inside already have a problem that’s weeks or months old. The damage didn’t start the night of the ice storm. It started with a clogged gutter in October, or an attic that was running 20 degrees warmer than the outside air.
What I’ve learned is that the surface of the roof gets all the attention, but the attic drives most of the winter damage. If your attic is poorly air-sealed and under-insulated, no amount of shingle inspection will fix the ice dam problem. You can rake snow off the roof every week and still see damage in spring because the underlying heat loss was never addressed.
I’ve also found that most homeowners try to handle everything themselves, which is fine for gutters and visual checks. But flashing issues and attic problems are genuinely tricky. I’ve watched DIY caulk jobs on flashing fail before the first big rain because the right approach requires specific materials and technique, not just sealant from a hardware store.
My honest recommendation: do the gutter cleaning and attic check yourself. If you find anything that looks like lifted flashing, shingle damage, or moisture in the attic, call a professional. The cost of an inspection is trivial compared to a roof replacement.
— Dan
Ready to protect your roof this winter? Ir-ga is here to help.
At Ir-ga, we work with North Georgia homeowners and property managers every season to catch problems before they become expensive. Whether you need a professional pre-winter inspection, storm damage repair after an ice event, or a full assessment of your attic and flashing systems, our licensed and insured team is ready.

We offer same-day responses and honest assessments. If we see something that needs fixing, we tell you clearly what it is and what it costs. No pressure, no guesswork. If winter has already left its mark on your roof, our step-by-step storm repair guide walks you through the process, and we’re ready to handle it for you from inspection through completion.
FAQ
What causes ice dams on North Georgia roofs?
Ice dams form when heat escaping from your attic warms the upper roof deck, melting snow that refreezes at the colder eaves. The trapped meltwater then backs up under shingles and causes leaks.
How often should I clean my gutters in winter?
Clean gutters before winter begins and check them after every major storm. Debris and ice buildup in gutters can cause water to back up and damage your fascia and roof decking within a single season.
Is it safe to remove snow from my roof myself?
Yes, if you use a roof rake from the ground and stay off the roof surface. Walking on an icy roof risks injury and shingle damage. Focus on clearing the lower 3 to 4 feet of the roof to reduce ice dam risk.
What R-value does my North Georgia attic need?
The Department of Energy recommends R-38 to R-60 for attic insulation in North Georgia’s climate zone. Uneven or compressed insulation creates warm spots that contribute directly to ice dam formation.
When should I call a professional roofer after winter?
Call a professional if you find lifted or missing shingles, cracked flashing, popped nails, or any signs of moisture or mold in your attic after winter. Small issues identified early cost far less to fix than water damage left to spread through spring.